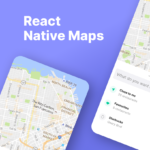
React Native Maps: the perfect complement for your React Native projects

Your React Native projects can have many functionalities. For example, we have seen that you can add Video or Camera. However, did you know that you can incorporate a map?
We are talking about the famous Google Maps, the most popular map library among mobile users. Of course, this will not be a native development but will allow you to add value to your projects.
Do you want to run Google Maps within your React Native projects? Following you’ll find everything you need to know.
Installing React Native Maps library with Google Maps
First, you should take advantage of Google Maps features with our app; we must enable the SDK for both iOS and Android. This must be set up in a Google project with an active billing account in Google Cloud Console. Then, we will create an API key for later adding to your code project.
Go to the Google Cloud Console and create a new project, which we will call Google-maps-project. Then enter the APIs library and enable the Maps SDK for Android and iOS. Are they already enabled? Then it’s time to create an API key in the Control Panel / Create Credentials.
Now that you already have the API key, you will need to enter app.json and type the following:
// app.json
{
  : {
    "name": "google-maps-example",
    "slug": "google-maps-example",
    "version": "1.0.0",
    "orientation": "portrait",
    "icon": "./src/assets/icon.png",
    "splash": {
      "image": "./src/assets/splash.png",
      "resizeMode": "contain",
      "backgroundColor": "#ffffffff".
    },
    "updates": {
      "fallbackToCacheTimeout": 0
    },
    "assetBundlePatterns": [
      "**/*"
    ],
    "ios": {
      "supportsTablet": true,
      "config": {
          "googleMapsApiKey": "REPLACE_FOR_API_KEY".
      }
    },
    "android": {
      "adaptiveIcon": {
        "foregroundImage": "./src/assets/adaptive-icon.png",
        "backgroundColor": "#FFFFFFFFFF"
      },
      "config": {
        "googleMaps": {
          "apiKey": "REPLACE_FOR_API_KEY".
        }
      }
    },
    "web": {
      "favicon": "./src/assets/favicon.png".
    }
  }
}
Add APIs on Android and IOS
To add the Key in an Android Bare project, you must add the API Key Google_maps_api.xml in the path Android/app/src/main/res/values as follows:
<resources>
  <string name="google_maps_key" templateMergeStrategy="preserve" translatable="false">(api key here)</string>
</resources>
On iOS, you will need to edit the AppDelegate.m file and include the snippet:
#import <GoogleMaps/GoogleMaps.h>.
@implementation AppDelegate
...
- (BOOL)application:(UIApplication *)application didFinishLaunchingWithOptions:(NSDictionary *)launchOptions
{
  [GMSServices provideAPIKey:@"_YOUR_API_KEY_"]; // add this line using the API key obtained from Google Console.
...
}
# React Native Maps dependencies
rn_maps_path = '../node_modules/react-native-maps'.
pod 'react-native-google-maps', :path => rn_maps_path
pod 'GoogleMaps'.
pod 'Google-Maps-iOS-Utils'.In Apple, you will need to tell Apple why you need to access the user’s location. They are strict with permissions! So if you don’t, your app will be rejected when uploaded to the App Store. To do this, go into the Info.plist file and edit the NSLocationWhenInUseUsageDescription field and concisely explain your reasons.
How can you customize a map?
You already have the map library integrated. However, how can you add map visualization for your app? It’s easy:
Create a Map.js component similar to this one:
import React from 'react';
import { StyleSheet, View, Dimensions } from 'react-native';
import MapView, { PROVIDER_GOOGLE } from 'react-native-maps';
import { mapStyle } from './mapStyle';

export function MapScreen() {
  return (
    <View style={styles.container}>
      <MapView
        customMapStyle={mapStyle}
        provider={PROVIDER_GOOGLE}
        style={styles.mapStyle}
        initialRegion={{{
          latitude: 41.3995345,
          longitude: 2.1909796,
          latitudeDelta: 0.003,
          longitudeDelta: 0.003,
        }}
        mapType="standard"
      ></MapView>
    </View>
  );
}

const styles = StyleSheet.create({
  container: {
    flex: 1,
    backgroundColor: 'black',
    alignItems: 'center',
    justifyContent: 'center',
  },
  mapStyle: {
    width: Dimensions.get('window').width,
    height: Dimensions.get('window').height,
  },
});
You will be able to customize almost all the map parameters. The most important ones are:
Providers, with a message indicating that we will use Google Maps.initialRegionwill be the starting location of the map.customMapStylewill allow you to generate a custom style.
Customize your maps in detail and improve user navigation
Last but not least, you can modify the look and feel of the map. The official Google documentation recommends a minimalist style to facilitate user navigation. So, an example could be the following:
//mapStyle.js
export const mapStyle = [
  {
    featureType: 'water',
    elementType: 'geometry',
    stylers: [
      {
        color: '#e9e9e9e9',
      },
      {
        lightness: 17,
      },
    ],
  },
  {
    featureType: 'landscape',
    elementType: 'geometry',
    stylers: [
      {
        color: '#f5f5f5f5',
      },
      {
        lightness: 20,
      },
    ],
  },
  {
    featureType: 'road.highway',
    elementType: 'geometry.fill',
    stylers: [
      {
        color: '#ffffffff',
      },
      {
        lightness: 17,
      },
    ],
  },
  {
    featureType: 'road.highway',
    elementType: 'geometry.stroke',
    stylers: [
      {
        color: '#ffffffff',
      },
      {
        lightness: 29,
      },
      {
        weight: 0.2,
      },
    ],
  },
  {
    featureType: 'road.arterial',
    elementType: 'geometry',
    stylers: [
      {
        color: '#ffffffff',
      },
      {
        lightness: 18,
      },
    ],
  },
  {
    featureType: 'road.local',
    elementType: 'geometry',
    stylers: [
      {
        color: '#ffffffff',
      },
      {
        lightness: 16,
      },
    ],
  },
  {
    featureType: 'poi',
    elementType: 'geometry',
    stylers: [
      {
        color: '#f5f5f5f5',
      },
      {
        lightness: 21,
      },
    ],
  },
  {
    featureType: 'poi.park',
    elementType: 'geometry',
    stylers: [
      {
        color: '#dedede',
      },
      {
        lightness: 21,
      },
    ],
  },
  {
    elementType: 'labels.text.stroke',
    stylers: [
      {
        visibility: 'on',
      },
      {
        color: '#ffffffff',
      },
      {
        lightness: 16,
      },
    ],
  },
  {
    elementType: 'labels.text.fill',
    stylers: [
      {
        saturation: 36,
      },
      {
        color: '#333333',
      },
      {
        lightness: 40,
      },
    ],
  },
  {
    elementType: 'labels.icon',
    stylers: [
      {
        visibility: 'off',
      },
    ],
  },
  {
    featureType: 'transit',
    elementType: 'geometry',
    stylers: [
      {
        color: '#f2f2f2f2',
      },
      {
        lightness: 19,
      },
    ],
  },
  {
    featureType: 'administrative',
    elementType: 'geometry.fill',
    stylers: [
      {
        color: '#fefefe',
      },
      {
        lightness: 20,
      },
    ],
  },
  {
    featureType: 'administrative',
    elementType: 'geometry.stroke',
    stylers: [
      {
        color: '#fefefe',
      },
      {
        lightness: 17,
      },
      {
        weight: 1.2,
      },
    ],
  },
];
That’s it! You now have a basic working map for your React Native development.
In short, you have now learned how to make a basic map run in React Native. For example, this feature can be very useful for all companies that want to make their location known.
If you want to read more articles about React Native Maps, you can continue browsing our blog, and you can also check out this awesome tutorial.
If you want to empower your team using ours or have an idea you need help with, feel free to schedule a call with us using the following link.
Leave a Reply