
React Flow: 1 top library to up-the-ante and slay
React Flow is a library for building interactive node-based graphs with React.
It provides a set of components and utilities to create and customize graph-based user interfaces, where nodes represent elements and edges represent connections.
React Flow allows developers to easily create and manage complex data visualization workflows, such as flowcharts, diagrams, or visual programming interfaces.
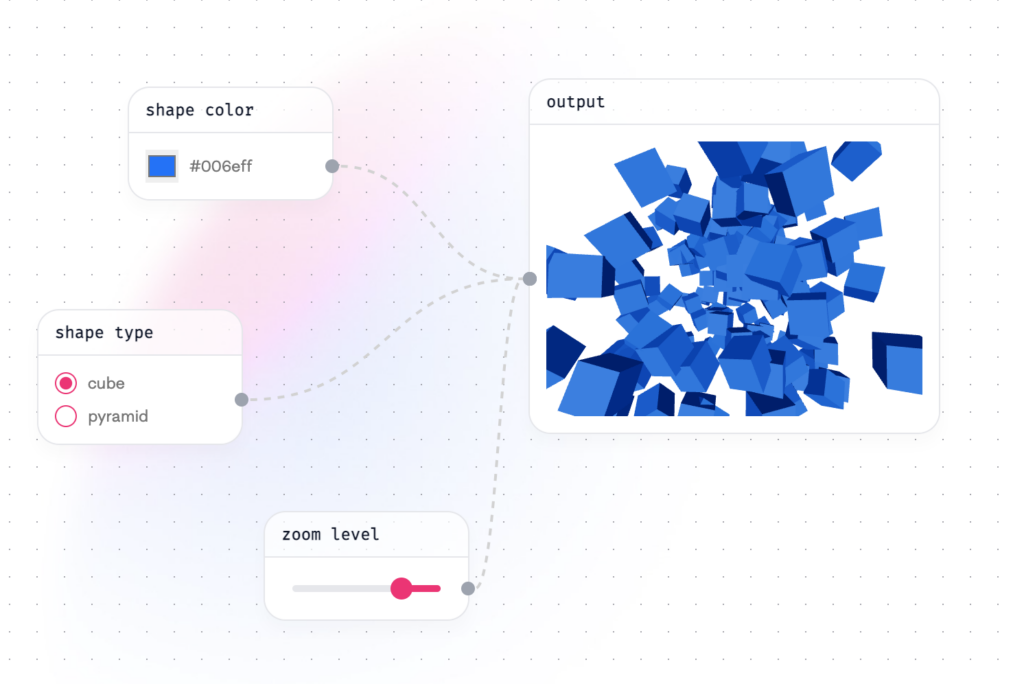
It offers features like drag-and-drop support, zooming and panning, customizable styling, and various layout algorithms for arranging nodes.
We use it in PreSale: the white-label version and it rocks!
With React Flow, developers can build dynamic and interactive applications that involve organizing and manipulating interconnected data elements in a graphical manner.
It abstracts away much of the complexity involved in handling user interactions and rendering graph-based interfaces, making it easier to focus on building the desired functionality.
React Flow is widely used in web development for tasks such as visualizing data structures, creating workflow editors, designing network topologies, and building diagramming tools.
It leverages the power of React to provide a flexible and efficient solution for building rich, interactive user interfaces with complex graph structures.
How React Flow works
React Flow works by providing a set of React components that you can use to build interactive node-based graphs. Here’s a basic overview of how it works in terms of code:
Installation: First, you need to install the React Flow library in your project. You can do this using npm or yarn:
npm install react-flow-rendereror
yarn add react-flow-rendererImporting Components: Once installed, you can import the necessary components from the React Flow library into your React components:
import ReactFlow, { ReactFlowProvider } from 'react-flow-renderer';Creating a Flow: Next, you create a flow by defining nodes and edges. Nodes represent elements in the graph, while edges represent connections between nodes. You can define these as arrays of objects:
const elements = [
  { id: '1', type: 'input', data: { label: 'Input Node' }, position: { x: 0, y: 0 } },
  { id: '2', type: 'default', data: { label: 'Default Node' }, position: { x: 200, y: 0 } },
  { id: 'e1-2', source: '1', target: '2', animated: true }
];
Rendering the Flow
You then render the ReactFlow component and pass the elements array as a prop.
You also wrap the ReactFlow component with the ReactFlowProvider to provide context for certain features, such as drag and drop:
const App = () => {
  return (
    <ReactFlowProvider>
      <ReactFlow elements={elements} />
    </ReactFlowProvider>
  );
};
Customization
You can customize the appearance and behavior of nodes and edges by providing configuration options as props to the ReactFlow component.
For example, you can specify node types, edge styles, and event handlers:
const nodeTypes = {
  customNode: CustomNodeComponent
};

const edgeTypes = {
  customEdge: CustomEdgeComponent
};

const onLoad = (reactFlowInstance) => {
  reactFlowInstance.fitView();
};

const App = () => {
  return (
    <ReactFlowProvider>
      <ReactFlow
        elements={elements}
        nodeTypes={nodeTypes}
        edgeTypes={edgeTypes}
        onLoad={onLoad}
      />
    </ReactFlowProvider>
  );
};Interactivity: React Flow provides built-in support for various interactions, such as dragging and dropping nodes, creating edges between nodes, zooming and panning, and selection handling. These interactions are handled automatically by the library, but you can also customize them using event handlers and callbacks.
Overall, React Flow simplifies the process of building interactive node-based graphs in React applications by providing a set of flexible and customizable components that handle the rendering and interaction logic for you.

You can achieve conditional branching in a series of questions by managing the state of the application based on the user’s responses. Here’s an example using React to illustrate how you can implement this:
import React, { useState } from 'react';

const Questionnaire = () => {
  const [currentQuestion, setCurrentQuestion] = useState(1);
  const [answers, setAnswers] = useState({});

  const handleAnswer = (questionNumber, answer) => {
    // Store the user's answer in the state
    setAnswers({ ...answers, [questionNumber]: answer });

    // Depending on the user's answer, navigate to the next question
    switch (questionNumber) {
      case 1:
        if (answer === 'A') {
          setCurrentQuestion(4); // Branch to question D
        } else if (answer === 'B') {
          setCurrentQuestion(3); // Branch to question C
        }
        break;
      case 3:
        // Additional branching logic for question 3 if needed
        break;
      default:
        // Default behavior if no branching is required
        setCurrentQuestion(questionNumber + 1);
        break;
    }
  };

  return (
    <div>
      {currentQuestion === 1 && (
        <div>
          <p>Question 1: What is your favorite color?</p>
          <button onClick={() => handleAnswer(1, 'A')}>A. Blue</button>
          <button onClick={() => handleAnswer(1, 'B')}>B. Red</button>
        </div>
      )}
      {currentQuestion === 3 && (
        <div>
          <p>Question 3: How old are you?</p>
          <button onClick={() => handleAnswer(3, 'A')}>A. Under 18</button>
          <button onClick={() => handleAnswer(3, 'B')}>B. 18 or older</button>
        </div>
      )}
      {currentQuestion === 4 && (
        <div>
          <p>Question 4: What is your favorite animal?</p>
          <button onClick={() => handleAnswer(4, 'A')}>A. Dog</button>
          <button onClick={() => handleAnswer(4, 'B')}>B. Cat</button>
        </div>
      )}
    </div>
  );
};

export default Questionnaire;
In this example:
- We have a
Questionnairecomponent that maintains the current question number (currentQuestion) and the user’s answers (answers) in the component’s state. - Each question is rendered conditionally based on the
currentQuestionstate. - When the user selects an answer, the
handleAnswerfunction is called with the question number and the chosen answer. - Depending on the question and answer, the
handleAnswerfunction updates the state accordingly and navigates to the next question based on the branching logic defined within theswitchstatement. - Additional branching logic can be added as needed for different questions and answers.
Mind the branding in React Flow
To add your company’s style to the questionnaire, you can apply CSS styles to the HTML elements within the component. Here’s an updated version of the Questionnaire component with some basic styling applied:
import React, { useState } from 'react';
import './Questionnaire.css'; // Import CSS file for styling

const Questionnaire = () => {
  const [currentQuestion, setCurrentQuestion] = useState(1);
  const [answers, setAnswers] = useState({});

  const handleAnswer = (questionNumber, answer) => {
    setAnswers({ ...answers, [questionNumber]: answer });
    switch (questionNumber) {
      case 1:
        if (answer === 'A') {
          setCurrentQuestion(4);
        } else if (answer === 'B') {
          setCurrentQuestion(3);
        }
        break;
      case 3:
        break;
      default:
        setCurrentQuestion(questionNumber + 1);
        break;
    }
  };

  return (
    <div className="questionnaire-container"> {/* Apply a class for container styling */}
      {currentQuestion === 1 && (
        <div className="question">
          <p>Question 1: What is your favorite color?</p>
          <button className="answer-btn" onClick={() => handleAnswer(1, 'A')}>A. Blue</button>
          <button className="answer-btn" onClick={() => handleAnswer(1, 'B')}>B. Red</button>
        </div>
      )}
      {currentQuestion === 3 && (
        <div className="question">
          <p>Question 3: How old are you?</p>
          <button className="answer-btn" onClick={() => handleAnswer(3, 'A')}>A. Under 18</button>
          <button className="answer-btn" onClick={() => handleAnswer(3, 'B')}>B. 18 or older</button>
        </div>
      )}
      {currentQuestion === 4 && (
        <div className="question">
          <p>Question 4: What is your favorite animal?</p>
          <button className="answer-btn" onClick={() => handleAnswer(4, 'A')}>A. Dog</button>
          <button className="answer-btn" onClick={() => handleAnswer(4, 'B')}>B. Cat</button>
        </div>
      )}
    </div>
  );
};

export default Questionnaire;
In this example, I’ve added a CSS file (Questionnaire.css) where you can define styles for the questionnaire.
Style the component
.questionnaire-container {
  max-width: 600px;
  margin: 0 auto;
  padding: 20px;
  background-color: #f7f7f7;
  border-radius: 8px;
}

.question {
  margin-bottom: 20px;
}

.question p {
  font-size: 18px;
  font-weight: bold;
  margin-bottom: 10px;
}

.answer-btn {
  display: block;
  width: 100%;
  padding: 10px;
  margin-bottom: 10px;
  background-color: #4CAF50;
  color: white;
  border: none;
  border-radius: 4px;
  cursor: pointer;
}

.answer-btn:hover {
  background-color: #45a049;
}
This CSS adds some basic styling to the questionnaire, including container styling, question styling, and button styling. You can customize the styles to match your company’s branding guidelines. Make sure to adjust the class names and CSS properties as needed.
Let’s call it a day!
It’s crucial for Sales teams and organizations to stay up-to-date with latest frameworks and be part of a robust community. People have something to teach.
Stay tuned, and don’t forget to check out our other posts for more insights on sales, methodologies, code improvement and tips!